Tuesday, February 25, 2014

Brie and Lindsey Want Cookies

My "get me to quitting time" treat this afternoon.


For some sweet girls who are looking for a good cookie...

Chocolate Chip Cookies*  (Makes 18 large cookies)

Ingredients

3/4 Cup Salted Butter, Melted
1 Cup Light Brown Sugar, Packed
1/2 Cup Granulated Sugar
1 Large Egg
1 Large Egg Yolk
1 Tbsp Vanilla Extract
2 Cups All Purpose Flour
1 Tsp Salt
1/2 Tsp Soda
Chocolate Chips (1-2 Cups depending on your preference)
Chopped Pecan or Walnuts (optional)

Process

Preheat oven to 325 degrees, line cookie sheets with parchment paper

In medium mixing bowl whisk together flour, salt and soda

In large mixing bowl combine melted butter, brown sugar and granulated sugar and whisk until all sugar is incorporated and mixture is smooth.

Add eggs, egg yolk and vanilla extract and whisk until completely mixed.

Add flour mixture to butter and sugar mixture stir with spoon until all flour is incorporated.

Add chocolate chips (and nuts if using) and stir to combine.

Cover bowl with plastic wrap and chill in refrigerator for 30 minutes.

Using 1/4 cup measuring cup or large scoop form walnut sized balls of cookie dough, placed about 2 inches apart on cookie sheet.

Prepare one sheet at a time, keeping remaining dough in refrigerator until just before ready to form balls and bake.

Bake for 13-15 minutes until edges just set and start to brown. Center of cookie will still appear moist and slightly under baked. 

Cool on sheet for 5 minutes, then remove to rack to finish cooling.

Cookie dough balls can also be formed, placed in the freezer on the sheet until frozen, then placed in zipper style freezer bag and kept for 6  months. Easy way to just bake a cookie or two at a time. I still bake them at 325 degrees, just increase the baking time to about 18-20 minutes. 

*This is the base recipe I use for Chocolate Chip, Chocolate Chip Pecan and Triple Chocolate Pecan. I use semi-sweet, dark and milk chocolate pieces for the Triple Chocolate Cookies. 

Happy baking, Brie!
Lindsey, tell Brie thank you!


Sunday, February 23, 2014

A Farm is Born


A Farm is Born


Just down County Rd N 600 E, near Dale, Indiana there's some weird doings going on. Tucked at the end of the road, near busy I-64 you'll find a family farm. A family farm in southern Indiana?! You don't say. But this isn't just any family farm. These folks are using crazy new ideas like having cattle, sheep and chickens wander around in fresh air and sunshine, happily grazing on things like native grasses, weeds, crawly bugs and the like. Who would have ever thought that something this revolutionary would work?

According to Jerry Steckler at Steckler Grassfed Farm there was no real master plan on his part when it all started back in 1986. He and his wife, Marsha, decided to take their family back to the land and moved from Newburgh, Indiana to the farm. As is typical of most small farms, the labor force comes from the family. Jerry and Marsha found themselves a little short on "man "power when they were blessed with a multitude of daughters. Maybe there was another way of doing things requiring less muscle and more innovation. An informational meeting with the folks from Purdue on rotational grazing provided the Stecklers with an alternative way of running the family business.

Just a quick lesson on rotational grazing so you can understand how it has played a part in the evolution of the Steckler's farm. Rotational grazing is the system of moving the farm critters between partitioned pastures of native grasses and plants. This allows the individual pastures to recover from the grazing and allow for more natural feeding, less need for supplemental feedings, reducing the need for growing large crops of hay, row crops and other things. Believe me, Jerry can explain this much more clearly than I can. And will be happy to do this if you stop by to visit them.

And so it began. As Jerry points out it's been an evolution. You don't just wake up one day and tell all the critters to go forth, graze and good luck. The herd had to be transitioned to the natural grazing, pastures had to develop. Additions of sheep and poultry also allows for greater use of the land and native plants as the sheep prefer things the cattle leave behind and the chickens can peck about keeping the bug population within reasonable limits. If you think about it, it required some reverse evolution since these "new" ideas are really the way God and nature intended for these animals to live and thrive. Sunshine, fresh air, green grasses, no antibiotics, no hormones and little disease and stress all add up to better lives for the animals and the people who consume the food they produce.

While the farm hasn't yet issued a formal mission statement, Jerry says it's pretty simple. They want people to have options for locally produced, organic, natural foods. "People vote for what kind of foods they want for their families by where they spend their dollars. What we are doing is working with nature to bring people wholesome, healthy food." He also recommends that you check out the Weston Price Foundation. Lots of interesting information and studies about our foods, environment, ways of life and the impact they have on our health and well being.

Beginning in 1995, poultry became the first offering from the farm. You can still order roasting and stewing hens, turkeys and buy eggs at the farm store. Over the years they've added lamb, beef and pork. And in 2007  the farm received its organic certification.

When I asked Jerry if he had all of this in mind back in the beginning he admits that he did not. He has a firm faith that greater powers have been at work at the farm. "God's got his hand on what we're doing here." The Stecklers have challenges just like the rest of us. Extremely dry conditions in 2012 led to reduction in useful pasture requiring a thinning of the herd and bulk beef availability is still recovering. Piglets don't grow as fast as anticipated and pork offerings are reduced. But where one door closes, another opens. And what walks through that door? Cheese!

Cheese production was something Jerry said he had been thinking about but hadn't taken the steps to make it happen. That push came when through a series of circumstances the farm lost buyers for its organic milk. Finding themselves with a glut of milk, cheese production seemed to be the next logical step. Working with consultants and rural development grants, Steckler Grassfed received a state permit in 2012 for on site cheese production. They currently offer four varieties, Colby, Cheddar, Monterey and Pepper Jack. The cheese has led to increased recognition of the farm and its brand. Moving its products into retail markets throughout southern Indiana and northern Kentucky. They've developed relationships with many of the local wineries that dot the landscape here and offer tastings at local retail markets carrying their product. They have plans to participate in the Evansville Farmers' Market this year and possibly other locations as well.
The farm was recently recognized as Member of the Year by the Spencer County Chamber of Commerce.

Jerry acknowledges it hasn't been easy or fast and he and the family continue to work hard to produce products they feel confident in and are proud of. But in the end he is quick to mention that "we still have more blessings than we don't have."

If you live in the area, I recommend you make a trip to the farm and to meet with Jerry and the family yourself. Visit the Farm Store and take advantage of the opportunity to see where healthy food is produced. I promise to do some follow up posts here on what I think will become regular visits and once this brutal winter moves on will have pictures of the Stecklers and happy cows lazing in sunny green pastures.

For more on the Stecklers' story, Farm Store hours, retail locations and how to order products from the farm, visit stecklergrassfed.com. You should also like their Facebook page and follow on twitter, if you're a tweeting kind of person.

On my recent visit, I picked up some Bright Meadows Organic Cheddar cheese and eggs. I decided a while ago I wanted to come up with a Cheddar Apple Scone and wanted to wait until I had some special cheese to use. So this week I began scribbling on my legal pad and finished up by baking a test batch on Saturday. Darlin' Mark approved, though he did suggest a few more apples next time, so I'm sharing the recipe with you today. Extra apples included.

It doesn't get more American than this....classic apple and cheddar combo. Cheese made with fresh, organic milk from happy Hoosier cows!


Cheddar Apple Scones  (makes 8 large scones)

Ingredients

2 Medium Apples ( I used Granny Smith and Jonagold.)
1 Tsp Ground Cinnamon
1/4 Tsp Freshly Grated or Ground Nutmeg
6 Tbsp Unsalted Butter, Frozen and Grated
4 Oz Sharp or Extra Sharp Cheddar Cheese (I used Steckler Farm Bright Meadows Organic Cheddar)
1/2 Cup Sour Cream or Plain Yogurt
1/3 Cup Whole Milk
2 Cups All Purpose Flour
1/2 Cup Granulated Sugar
2 Tsp Baking Powder
1/4 Tsp Baking Soda
1/4 Tsp Salt

Process

Preheat oven to 325 degrees

Peel, core and chop apples into approximately 1/2 inch pieces. Lay in single layer on parchment paper lined baking sheet. Sprinkle with cinnamon and nutmeg. Bake in oven for 20-25 minutes until just start to soften and appear slightly dry. Remove from baking sheet and place on plate or bowl and refrigerate until cool. 


While apples are cooling, grate 6 Tbsp of frozen butter using large side of box grater, food processor or mandolin. Place butter on plate or in med bowl and put back in freezer until ready to use.

It's like butter confetti....now that's a party!


Chop cheddar cheese into 1/4 inch cubes and refrigerate until needed.


Chop a little extra for nibbling.


Combine sour cream and milk in small bowl or measuring cup and refrigerate until needed. 


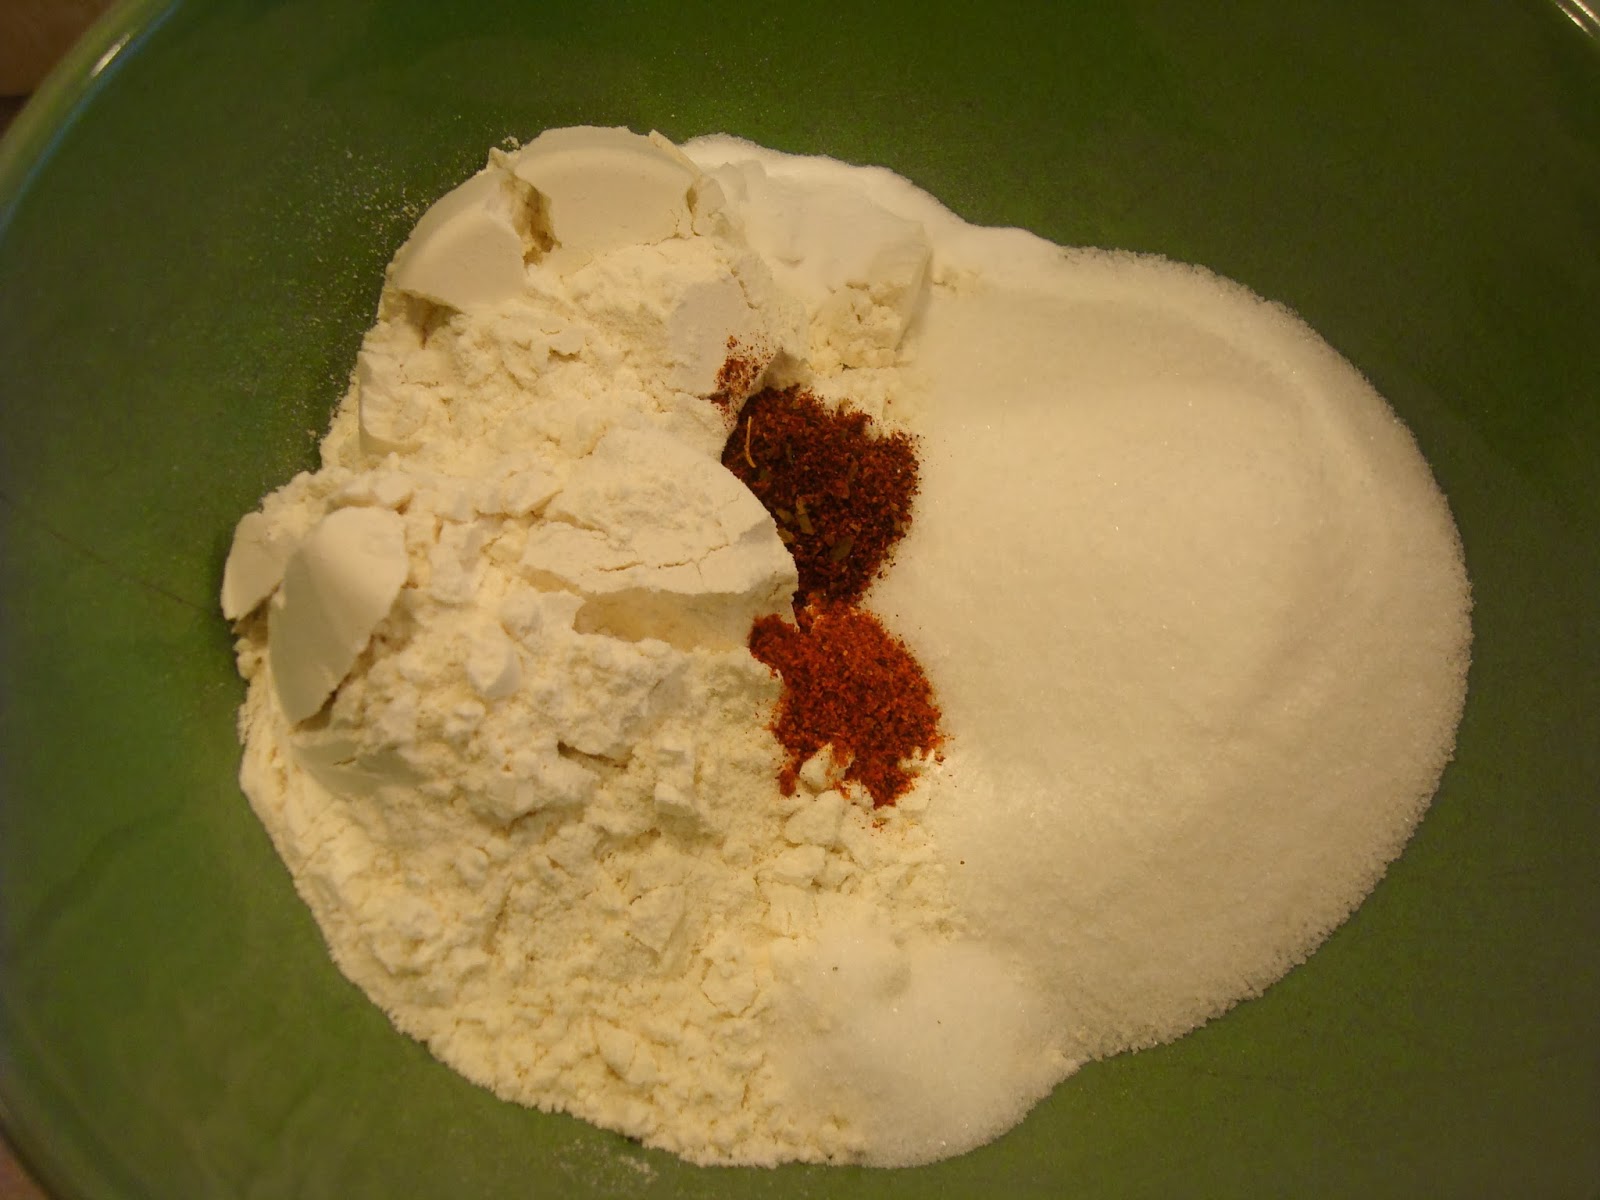
In medium mixing bowl, whisk flour, sugar, powder, soda and salt together. Set aside.

Where's the soda?

Always late for photo shoots...what a diva!


Once apples have cooled, remove butter from freezer and toss in flour until all bits are coated in flour. 


Make a well in center of flour/butter mixture and add milk/sour cream mixture. Using plastic spatula or scraper, lightly fold just until liquid is absorbed. Dough will be very dry and crumbly appearing. (the liquid from the apples and additional fat from the cheese will moisten the dough when baking.)


Turn dough onto floured surface and lightly knead 5-6 times, pat into rough square.


Using floured rolling pin, roll into 12 x 12 square. 

Using bench scraper or large spatula, starting at far side, fold dough by thirds like a business letter.


Then fold each end over to form a 4 x 4 inch square. 


Place on floured plate and freeze for 5-10 minutes.

Take dough from freezer, roll into 12 x 12 inch square. Sprinkle chopped apples and cheese over dough. Lightly press apples and cheese into dough. 


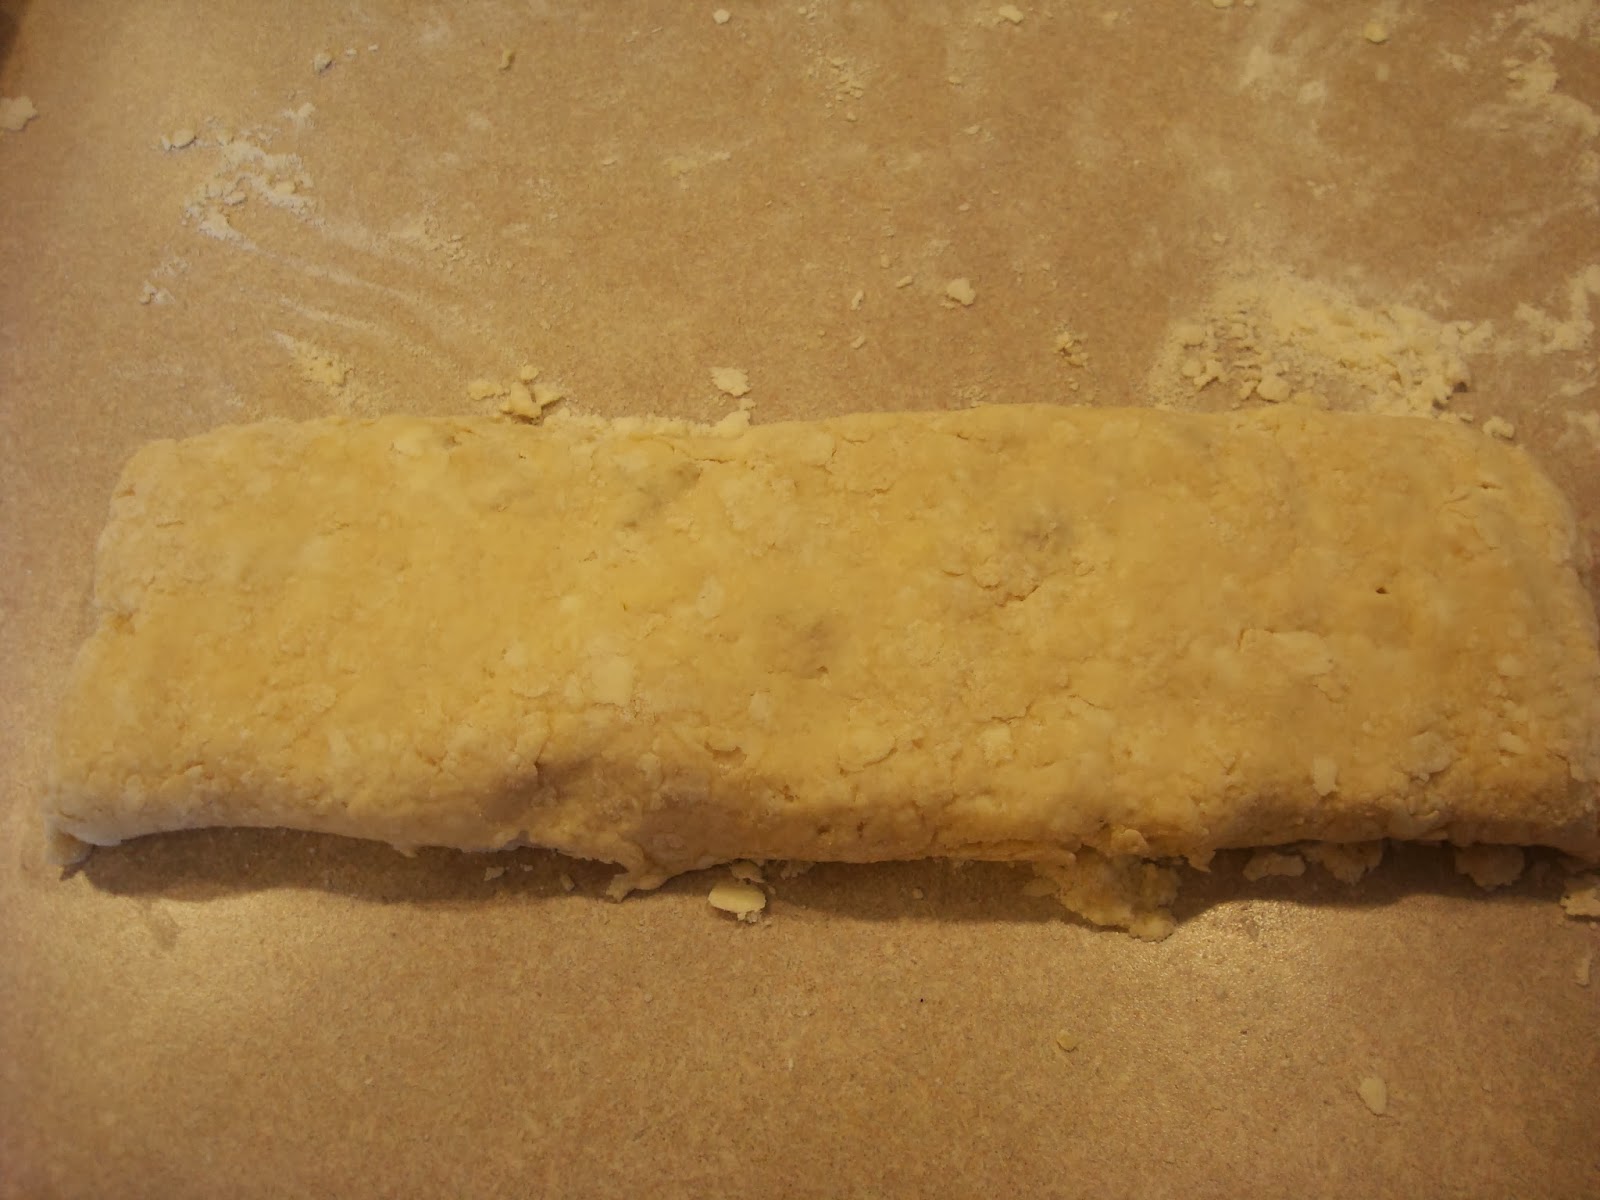
Start at far side, roll dough towards you into tight log.


With seam side down, press and pat log into 12 x 4 inch rectangle.


Cut in half. Then cut each half into 2 pieces. Then cut each square into triangles.


If baking immediately, heat oven to 425 degrees, brush tops with cream and sprinkle with cinnamon sugar. Bake 15-20 minutes until golden brown.


Can be frozen and baked at later time. Remove from freezer, brush tops with cream, sprinkle with cinnamon sugar and bake at 350 degrees for 20-25 minutes. 


Wednesday, February 19, 2014

Happy I Didn't Have Brussel Sprouts

Where it all began


Quite often my baking and cooking plans are determined by my own cravings or what might be lying around the house getting ready to go "belly up" if I don't do something with it soon. Tonight's baking experience is brought to you by the need to utilize the orange sitting on my counter top before it shriveled up and croaked.

I'm sure you're thinking, "why don't you just eat the orange?" A valid point. But I feel that anything already tasty can be made even tastier with the addition of butter, sugar and a myriad of spices. I do not claim to be a health food devotee. While I detest the idea of antibiotics, hormones, strange man made chemicals and preservatives in my food, I adore things that come from cows and chickens and trees, flowers, birds and bees. So I have worked over the past couple years to move to organic options whenever available, experiment with more natural sweeteners such as honey and raw sugar and boost flavors with fruits, nuts and all the wonderful spices and herbs there are out there.

So, I will not apologize for my unconditional love of all things baked and buttery. Which led me to take the orange and start adding friends to the party to come up with Orange Ginger Spiced Muffins.

With the exception of the streusel topping, which tastes fine, but doesn't have the look I was going for, they turned out just right. A nice warm orange flavor base, enough ginger to have a little bite, but not overwhelm. I think the next time, I'll add the walnuts to the muffin and omit it from the streusel. Otherwise, can't think of anything I'd change.

I don't have photos of the process tonight as I wasn't sure I would be ready to post the recipe on the first run. But I think I'll put it out here and let you see what you think. Make sure and let me know if you try any of the recipes and how they work for you. I'd love to hear your ideas.

Oh, what does this post have to do with the brussel sprouts in the title? Nothing other than I'm just really happy I didn't have to come up with some sort of brussel sprout beet quinoa cake or something....

* I'm not including the streusel for the recipe now, because I don't really like the one I used.....there are a multitude of streusel toppings out there on the interweb. Search around. Once I come up with one I really like, I'll share.


Orange Ginger Spiced Muffins (makes 18 regular sized muffins)

Ingredients   

3 Cups All Purpose Flour
1 3/4 Cup Granulated Sugar
1 Tbsp Baking Powder
1 Tsp Cinnamon
1 Tsp Ginger
1/2 Tsp Salt
1/2 Tsp Baking Soda
1/2 Tsp Freshly Grated Nutmeg or 1/4 Tsp Dried Nutmeg
1/2 Tsp Ground Cardamom
2/3 Cup Golden or Regular Raisins
1/2 Cup Chopped Walnuts (optional)
1/2 Cup Sour Cream or Plain Yogurt
3/4 Cup Heavy Cream or Whole Milk
5 Tbsp Butter, Melted
5 Tbsp Canola Oil
2 Large Eggs
1/4 Cup Freshly Squeezed Orange Juice
Zest of 1 Large Orange

Process

Preheat oven to 375 degrees and butter or spray muffin pan or use paper liners

Using small saucepan heat raisins and orange juice over low heat until just warmed. Remove from heat and allow to sit for 5-10 minutes to soften raisins and soak up some of the juice. Drain using fine mesh strainer and set juice aside to use later.

In large mixing bowl, whisk together flour, sugar, soda, powder, salt, cinnamon, nutmeg, ginger and cardamom.

In medium mixing bowl, whisk together sour cream (yogurt), cream (milk), eggs, orange juice, melted butter, canola oil and zest

Toss raisins (and walnuts if using) in flour mixture with plastic spatula just to coat, make well in center. Pour liquid mixture into dry ingredients and gently fold with spatula until just mixed. May have streaks or chunks of dry flour in batter, this is ok. The secret to having fluffy, tender muffins is not over mixing.

Spoon into muffin pans and bake for 18-20 minutes rotating pan half way through baking. 

Cool in pan for 5 minutes, then remove from pan and eat.

Call the neighbors to take some home with them if you are all alone....


Monday, February 17, 2014

Chocolate Cupcake Recipe


I made these cupcakes today to use up the excess whipped chocolate ganache from last week's Black Forest Torte. While the addition of the ganache in the center makes these really special, it's a great go to all occasion chocolate cupcake recipe.

I have to admit I had a little difficulty baking these up today with Pops gone. It was awful quiet and I've lost the best guinea pig I've ever had. I could always count on him to try out whatever I'm cranking out of the oven. You'll just have to trust me on this one, they're pretty darn good. And in case you're worried about Pops getting his chocolate fix, I just talked to him and he's polished off most of a pack of 10 fun size Hershey bars I picked up with his groceries yesterday when getting him settled back in his own digs.


Note the plastic bag of leftover ganache on the right that started this whole thing.

Cupcakes  (Makes 12 cupcakes)

Ingredients

3 Ounces Bittersweet Chocolate, coarsely chopped 
1/3 Cup Dutch Processed Cocoa
3/4 Cup Hot Coffee (can substitute 3/4 cup hot water and 1 tsp espresso powder)

3/4 Cup Bread Flour
3/4 Cup Granulated Sugar
1/2 Tsp Salt
1/2 Tsp Baking Soda
1/2 Tsp Chili Powder
1/8 Tsp Cayenne Pepper

3 Tbsp Melted Butter
3 Tbsp Canola Oil
2 Large Eggs
1 Tbsp Vanilla Extract
2 Tsp Rice or White Vinegar

Process

Preheat oven to 350 degrees and prepare muffin pan with cupcake liners

Using medium mixing bowl, pour hot coffee over chopped chocolate and cocoa powder, let sit for 5-10 minutes, whisk until smooth and allow to cool to room temperature.

Make sure and just stand over the bowl and breathe deeply for a minute. Chocolate and coffee make the most intoxicating aroma. If Darlin' Mark was more fond of chocolate, I'd dab a little behind my ears. Maybe I should dab a little behind his. 

While chocolate mixture is cooling, whisk flour, sugar, salt, soda, chili powder and cayenne pepper in small bowl.


After chocolate mixture has cooled, whisk in butter, oil, eggs, vanilla extract and vinegar until well mixed and smooth. 


Add flour mixture to chocolate mixture and whisk until smooth.


Spoon batter into paper lined muffin pan to approx 2/3 full.  Or use this wonderful little gadget and actually fill them up without slopping batter all over the kitchen counter....


If, like me, you are trying to use up leftover ganache, then use a small ice cream scoop or a teaspoon and drop a glop into the middle of each cupcake before baking.


Bake in 350 degree oven for 18-20 minutes, rotating half way through. 

Let cool in pan for 10 minutes, then remove from pan and cool completely on rack.


Chocolate Kahlua Buttercream Frosting

Ingredients

3 Ounces Bittersweet Chocolate, coarsely chopped
1/2 Cup Heavy Cream
1 Tbsp Kahlua
4 Tbsp Butter, softened
3-4 Cups Confectioner's Sugar

Process

Mix chocolate and kahlua in small bowl.
Heat cream in small saucepan until just comes to boil and pour over chocolate and kahlua.
Let sit 5-10 minutes, whisk until smooth and let cool to room temperature.

Once chocolate mixture has cooled, using stand or hand mixer, beat butter until smooth, fluffy.  
Reduce speed to low and slowly add melted chocolate mixture to butter, once all chocolate is added, increase mixer to medium and mix until thoroughly incorporated. 
Reduce speed to low again and begin adding confectioner's sugar 1 cup at a time until completely mixed, smooth and fluffy. 
If frosting is too thick, you can add cream or milk a tsp at a time or if too thin add sugar 1 tbsp at a time until desired consistency. 

Using decorator bag, (or a zipper type storage bag if you're out, like me) to pipe frosting on cooled cupcakes or spread frosting with spatula or knife. 


Saturday, February 15, 2014

Italian Cream Cupcakes Recipe


By Request


Cupcakes   (makes 24 cupcakes)

Ingredients

8 Tbsp Salted Butter, Softened
1/2 Cup Canola Oil
2 Cups Granulated Sugar
1 Tbsp Vanilla Extract
5 Large Eggs, Separated
2 Cups All Purpose Flour, Sifted
1 Tsp Baking Soda
1 Cup Buttermilk or Whole Milk
1 to 1 1/2 Cups Sweetened Flake Coconut
1 Cup Chopped Pecans

Process

Preheat oven to 350 degrees and prepare muffin pans with paper liners.

In medium bowl whisk sifted flour and baking soda
In medium mixing bowl whip egg whites on high speed until stiff peaks form
In large mixing bowl cream butter, oil and sugar on medium high speed until light and fluffy, about 7 minutes
Reduce speed to low and add 5 egg yolks and vanilla extract just until incorporated
Add 1/3 of flour/soda mixture, alternating with 1/2 buttermilk or milk, ending with flour.
Add coconut and pecans just until mixed
Stop mixer and fold egg whites into batter with spatula. Some streaks of egg white will remain
Spoon batter into cupcake liners and bake on middle rack of oven until cakes are golden brown and spongy
Cool in pan on rack for 10 minutes, then remove from pan and cool on rack completely before frosting
Cakes will settle some while cooling

Cream Cheese Frosting

Ingredients

6 Tbsp Unsalted Butter, Softened
6 oz Cream Cheese, Softened
1 Tsp Vanilla Extract
1 Lb Confectioner's Sugar
2-3 Tbsp Milk

Process

Cream butter and cream cheese on high until light and fluffy
Reduce speed and add vanilla extract
On low speed, add confectioner's sugar 1 cup at a time and mix until smooth
If frosting is too stiff after adding all sugar, add milk 2-3 tsp at a time until desired consistency

Frost cupcakes or pipe frosting with decorator bag and tip

Garnish with finely chopped pecans and flaked coconut


Friday, February 14, 2014

How Not to Bake Cinnamon Raisin Bread

I always tried to turn every disaster into an opportunity.

Excellent advice from Mr. Rockefeller. I put it to good use this morning while trying to work on that Cinnamon Raisin Bread I was baking up to appease the weather gods. Since we have around 3 inches of snow and more on the way, they obviously are aware of the mess I made of the whole process.

It all began with researching and planning the recipe last night while watching basketball with Pops, fielding text messages and phone calls and sipping an adult beverage. Possibly some errors in calculations or transcribing. It continued when I decided to get a jump on things early this morning and began to assemble the dough at 7 am, no coffee on board, Pops providing commentary and the thought of more snow on the way.

Let me start by telling you that dumping 4 1/2 teaspoons of active yeast into cold milk will not work. And when you take into account that there's no way a recipe for one loaf of bread would call for 4 1/2 teaspoons of yeast in the first place, it only compounds the problem. Unfortunately, that little gem of wisdom escaped me until I was brewing up the second batch of warm water and scalded milk and realized it only after adding the third teaspoon of yeast. At this point in time, I just stopped at 3 and figured I'd see what happened.

What happened was realizing while mixing the dough, I appeared to have something the consistency of that sticky glue stuff that holds labels on those disposable plastic storage containers in the local grocery. I stared at it, poked it, pondered it and read over my scribbles on my legal pad and finally came to the conclusion that in no world does 2 + 1 1/3 + 1/3 = 2 1/3. So a mere extra cup of flour.... why not.

At this point, I gave up trying to knead the bloody mess and tossed it in the bowl of my trusty Kitchenaid, Ruby, stuck the dough hook on and turned her loose. I then began to pour milk into the mess until it began to morph into something closer to dough, then more flour, then more milk, then just walked away and left it kneading for about 10 minutes while I began to slam cup after cup of coffee.

After the marathon kneading episode, I poked the dough again and it actually felt a little like bread dough should. So I decided to grease up a bowl throw it in there, cover it up and let it rise. If it would. Feeling much better about it at this point in time, I turned to head into my office and start the day and walked right by a lovely bowl of raisins. Raisins. In the bowl. Not in the dough. Whatever....as Pops is so fond of saying. I'll shove them in there later if it raises.

It raised. Again I'm somewhat amazed. I managed to shove, twist, push and knead some raisins into the dough. Roll it out, brush it with egg wash, throw sugar, cinnamon and chopped pecans on it. Rolled it up, let it raise and baked the sucker.

Looks like bread. Smells like bread. Feels like bread. So, does it taste like bread. Yea, it actually does. "Not bad at all, there, Lori," is the official word from Pops. Toast it up and slather it with butter and it's nearly palatable.

So is it the best thing I've ever baked. Not hardly. But it's not the worse thing either, by far.

And so in conclusion, dear readers, there will be no recipe tonight. I have no earthly idea what's in the beast. But I will be repeating the process using the correct recipe and technique in the very near future and will happily share it at that time.


This post is dedicated to my darling stepdaughter, Melissa. She is thoroughly convinced that I never completely screw anything up in the kitchen. Let this be a lesson that with enough determination and butter almost anything can be rescued.


Tuesday, February 11, 2014

Chocolate Therapy


It's a beautiful day here in the hills of southern Indiana. The sun is shining, the sky is blue. If you discount the fact that it's 17 degrees and that's the high for today you might just go crazy and do something like go outside. As soon as you realize your eyelids are frozen open, you'll come back in.

This day started like so many others. Well, actually, it didn't start like any other that I can recall. Darlin' Mark had a 7:30 am flight to catch out of Louisville. A mere 1 1/2 hour drive from our little piece of paradise. So the alarm was set for 4:30 am. Somewhere around 4:15, I was awakened by some sort of ruckus in the other end of the house. Rattling, banging and general clatter. I first thought that maybe some ferocious woodland creature had made it's way inside again. (I'll share the snake story at a later date.) I waited for Darlin' Mark to wake up and come to my rescue, but alas, it was not to be. So I ventured forth and found the source of the disturbance. Seems Pops was up trying to answer the call of nature and found himself trapped in the bedroom by a faulty doorknob. Needless to say, Darlin' Mark had to be summoned to the rescue and with his trusty screwdriver freed Pops from almost certain disaster. Or at the very least having to heave himself out the window in his boxers.

Disaster averted, it was off to the airport. Darlin' Mark has completed the clandestine potato operation and has been given a new assignment. Some sort of top secret jam session in Memphis with the code name Smucker's. A quick trip to town for a stop at the post office, bank and  local grocery (where I made a major score on Pop's favorite variety of Hamburger Helper) and I returned to the house to find him napping safe and sound on the couch. Not sure I'll be able to coax him back into his room after today.

I then had to come up with some way to top the excitement of this already monumental day and could only think of one thing. Chocolate. Actually I think of chocolate a lot. I still cannot figure out how a sweet loving, chocolate craving girl like me ended up here with a whole bunch of people who do not believe that dessert is the most important meal of the day or that chocolate is one of the major food groups. I have told them on several occasions that this causes me to doubt their patriotism, intelligence and mental stability. But with Pops here visiting this month, I have a co-conspirator in my quest for sweets, treats and yummy things. He's been known to down an entire box of chocolate covered cherries in a day or two and so the Black Forest Torte was conceived.

Black Forest Torte


This torte is not for the casual chocolate lover. It's packed with a pound of semi-sweet and bittersweet chocolate, butter, eggs and amaretto. Covered with chocolate ganache, topped with more whipped ganache, cherries and whipped cream. The good news is it has no flour, therefore gluten free, and only 1/4 cup of sugar. That's as close as I can get to pretending it's not a heart attack on a plate. But it's Valentine's Week and I love chocolate. And Darlin' Mark will not be here to lavish me with adoration and priceless gifts, so I intend to eat chocolate. And a lot of it.

Keep in mind, the torte needs to cure overnight in the fridge before serving, so a little planning is in order if you plan to make it for a specific occasion.

9 Inch Springform Pan
Butter
Parchment Paper
Large Roasting Pan for Water Bath


Torte

8 oz Bittersweet Chocolate, coarsely chopped 
8 oz Semi-Sweet Chocolate, coarsely chopped (can use chocolate chips)
1/2 Lb (2 sticks) Unsalted Butter, cut into cubes
2 Tbsp Amaretto 
8 (yes 8) Large Eggs
1/4 C Granulated Sugar
1 Tbsp Vanilla Extract
1/2 Tsp salt

Ganache

2 1/2 Cups Heavy or Whipping Cream
12 oz Semi-Sweet Chocolate, coarsely chopped
4 oz Bittersweet Chocolate, coarsely chopped

Cherry Topping

2 Cups Fresh or Frozen Tart Pie Cherries
1 Tbsp Lemon Juice
1/2 Cup Granulated Sugar
2 Tsp Corn Starch


Whipped Cream

2 Cups Heavy or Whipping Cream
1/4 Cup Confectioner's Sugar
1 Tsp Vanilla Extract
1 Tsp Unflavored Gelatin 
4 Tsp Cold Water


Prepare and Bake Torte


Preheat oven to 325 degrees
Butter bottom and sides of springform pan, line bottom with round of parchment paper.


Wrap bottom and up sides of springform pan with heavy duty aluminum foil. Use 3-4 layers of foil to protect from water seeping into bottom of pan.


Combine chocolate, butter and amaretto in metal bowl.

You could stop here and be ok


Using double boiler or metal bowl over a saucepan of simmering water, melt butter, chocolate and amaretto. 


Stir occasionally until completely melted and smooth. Remove from heat.


While chocolate mixture is melting, combine eggs, sugar, salt, vanilla in bowl of stand mixer or large mixing bowl.

That's 8 eggs folks


Mix on med-high for 5-10 minutes or until frothy and almost doubled in size. 


Add 1/3 egg mixture to chocolate mixture and fold gently with plastic scraper.


Repeat x 2 until all egg mixture is combined with chocolate. 


Pour batter into sprinform pan.


 Place roasting pan on middle rack of oven. Place springform pan in center of roasting pan and add hot water 1/2 way up sides of springform pan. 

Water bath helps custards, cheesecakes, tortes cook evenly and avoid cracks in top of  cake


Bake until edges of cake just start to set, center will still appear slightly moist. Approximately 40-45 minutes.


Remove springform pan from roasting pan and cool on rack until room temperature. Once completely cooled, cover and refrigerate 8 hours or overnight.

Prepare Cherry Topping

In medium saucepan combine cherries, lemon juice, sugar and corn starch.


Cook over medium heat until cherries release their juices and mixture thickens to a syrup consistency.


Chill in refrigerator until ready to assemble cake and serve.

After torte has cured, prepare ganache.

Place 1 lb coarsely chopped semi-sweet chocolate in medium mixing bowl.


Heat 2 1/2 cups cream in small saucepan over medium heat until just comes to a boil.


Pour heated cream over chocolate and let sit 10 minutes.


While ganache is melting, remove torte from pan by running a knife around edge of pan, unlatch springform pan and remove side. Invert cake onto plate, remove parchment paper from bottom of torte, then turn back over onto cake plate or serving plate.


After 10 minutes gently stir the cream and chocolate mixture until all chocolate is melted and it is smooth.


Pour approximately 1 cup of warm ganache over top of cake and smooth to edge of torte. It's ok if it runs over the sides.  Let chill until set.


At this time you can decide to serve the torte by letting it set at room temperature for 1 hour before slicing, spooning cherries over the top and adding a dollop of whipped cream. If you want to finish the assembly as pictured in the post, then continue with the directions below for whipped ganache and stabilized whipped cream for piping and decorating. 


Let remainder of ganache come to room temperature and then using stand or hand mixer, whip remaining ganache until light, fluffy and consistency of whipped cream type frosting.


Using decorator bag and large star tip, pipe whipped ganache around top and bottom of torte or if you prefer, spread over top of poured ganache layer.

Chocolate on chocolate on chocolate has to be one of  my favorite options


Chill torte in refrigerator for 30 minutes to 1 hour until ganache is set.

Spoon cherry mixture over top of torte.


If you plan to spoon whipped cream over torte as it is served, then follow instructions for basic whipped cream below. If  you plan to pipe whipped cream onto torte and store until serving, then you will want to prepare stabilized whipped cream to avoid it melting and seeping cream on the cake. 


Whipped Cream

In chilled bowl, using stand or hand mixer with whisk attachment, whip cream, sugar and vanilla until stiff peaks form. 

Stabilized Whipped Cream

My son, Sam, was completely dumbfounded as to why anyone would have unflavored gelatin in the house


Add 4 tsp cold water to small saucepan and sprinkle 1 tsp of unflavored gelatin over water. Let sit until dissolved.


Combine 1 cup heavy cream, 1/4 cup confectioner's sugar, 1 tsp vanilla in large mixing bowl or bowl of stand mixer and whip on medium speed until slightly thickened.


Warm gelatin mixture over low heat until dissolved and nearly clear. Pour into cream mixture with mixer running.


Whip until stiff peaks form.


Using decorator bag and large star tip, pipe whipped cream on torte and garnish with chocolate curls, grated chocolate or cocoa powder. 


Let torte sit at room temperature for 1 hour before serving. 


Serve it up to your daddy and watch him smile!